How to build a longskate to 'surf' on.
In this section we help you to build a longskate to improve your longboard surfing on. Now this board will not cut it in vertical terrain, nor will you be able to kickflip it. If you want a new school or park deck there are plenty of commercial ones to choose from. However if you want a cruiser which allows you to longboard surf train then the commercial ones are usually slightly lacking. The first thing is that it is hard to get a deck that is over 52" long, flat and rigid. 98% of commercial decks over 52" are still made of ply and and are pretty flexi, also most tend to suffer from excessive wheel cutouts in the deck. Designed to make your deck carve without wheelbite they screw up a lot of nose tricks and the ones in the tail are where your feet will be when carving off the tail. There are a lot of nice boards under 50" which would be perfect with another 10" added. So we are basically left with building it yourself.
SHAPE
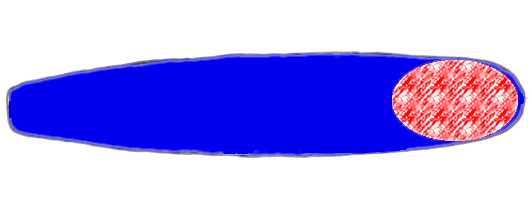
First of all plan out your shape on some paper. I use graph paper and do it to scale. Your basic decent shape will be very similar to a decent 9'6" noserider surfboard. It is better to have the tail squarer than your average surfboard though. Here is a rough idea:
Decide on what length you want. I have found around 58" seems ideal. Much longer and you lose some manoeuvrability. Any shorter and you will not be able to get a surf technique feel out of walking the board, drop knee turns etc.
Then you have to make a template. Get a length of paper (old rolls of telex paper are ideal, If you have none around then an art shop will fit you up. Otherwise tape a few A3 pieces of paper together) and mark a centreline down it. Next fold the paper in half. Then draw half the board lengthways on the paper. A word of warning is that the nose will always end up a little sharper than it looks. When you are happy with the dimensions ad shape carefully cut the shape out. Now here you can either put both halves of the paper together and cut the whole board out at once. Or you can cut one side out, fold it over and trace around it, then cut the other half out. Either way has pros and cons. I usually cut it out all at once.
So now you have a paper template.
WOOD
Finding the ideal wood is your next task. There is no need to find some 13 ply wood or make your own. In fact our type of boards are better made from real wood. They will be a bit heavier but weight is of no concern really. I use 19 mm thick Tasmanian Oak, it is a cold weather hardwood so you should be able to find the equivalent in a timber store where you live. The length you need shouldn't have much (if any) flex under your weight when put on a brick either end.
SHAPING
Next thing to do is mark on your template where the trucks will be. This will depend on which trucks you use obviously but I mount the trucks on the following formula
NOSE - the axle should be about 7 1/2 inches from the nose
TAIL - the axle should be about 8-9 inches away from the tail
Use a set square and ruler to draw right angled lines from the centre line and mark where the middle of the mounting holes are. It is easiest to put your trucks on the lines to get the holes perfect.
Then glue your template to the wood blank with a glue stick type glue. This will give you enough time to drill the truck holes. YES do this NOW and then trace around the template and peel your template off. The idea with putting the truck holes in now is that it doesn't matter it your cutting goes slightly off now as the middle line and trucks are already OK. Cutting it out then trying to draw a centre line on the wood to line the trucks with up is a NIGHTMARE.
Then get a jigsaw and carefully cut the shape out. By now you will be getting excited and wanting to finish it quick ! Resist the temptation and take it steady.
Now you have your basic shape use an electric sander to round off the edges and smooth the top and bottom off. Then hand sand the edges and give the top and bottom a hand finish with very fine sandpaper or even wire wool.
FINISHING
You could now put your trucks on, put some grip tape on the top and be off. But as it is a labour of love you'll want to finish your new baby off nicely. Now is the time to stain your deck. Experiment with a piece of off-cut to get the desired finish. I apply the stain with a lambs wool applicator. When its dry apply any stickers or artwork you want. Then put on at least 3 coats of varnish, it is best to have a hard gloss epoxy varnish.
Now you'll need to decide how to slip proof the top of the deck. You can grip tape it, Now a full grip tape will be expensive and I find it is not as good for walking tricks etc. A better way to griptape is to put on 2" strips up the deck so they look like stringers on a surfboard. Just make sure that the edges of the deck have tape very near to them.
An option is to use a see through grip finish. Usually done by mixing silicon sand into varnish and applying a layer. You can buy stuff like TRUEGRIP in hardware shops which are basically the same but give a better finish.
So there we have it your new deck !
Go carve and soul ride yourself silly.